Building a Prusa i3 Mk2
I'm quite a long way though the build. I spent about 2 hours on it on Tuesday night and another 2 hours last night. I have the extruder mounted on the X-Axis, so basically all the mechanical parts are done.
I've messed up a few things: I couldn't get the rods fully into the X-Axis motor mount, until I resorted to using a hammer. Also, when I slid the X-Axis on, I wrecked one of the bearings. Fortunately I had a spare lying around.
Here are some of the sub-assemblies: the Y-Axis:


I've messed up a few things: I couldn't get the rods fully into the X-Axis motor mount, until I resorted to using a hammer. Also, when I slid the X-Axis on, I wrecked one of the bearings. Fortunately I had a spare lying around.
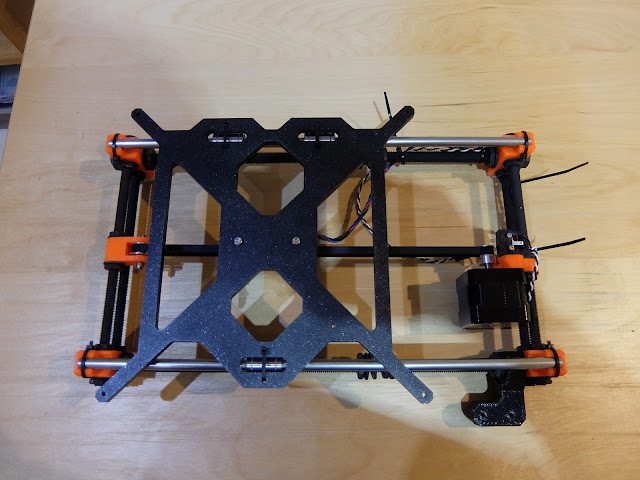
Here are some of the sub-assemblies: the Y-Axis:

The troublesome, too long X-Axis:

I think I have the hang of the instructions now. It's pretty easy to not get everything oriented correctly: for example, the cable management depends on the correct orientation of the motors and fans. I still managed to put the extruder fan in the wrong way the first time. It's an annoying mistake, because where the screws are tapped into plastic parts they are very stiff!
I have to say, I feel the whole thing is a bit flimsy, and I'll be genuinely surprised when when it works! Hopefully buying a kit won't prove to be a terrible mistake.
Here it is, build complete:

It passes the self test! On to the XYZ calibration, and it says I've built it square, and it doesn't need to do axis compensation. Quite pleased with that.
I think it's taken 6 hours to get to this point.
There's one more step, where you have to get the print head exactly the right height for the first layer. First you load some filament, and then it draws a test pattern on the bed. You examine the single thread of plastic, which is meant to be slightly flattened. I started off trying to do this with a magnifying glass. I think I'd suggest you make sure you start from too high, and then keep lowering. First, the thread will start to adhere just in places - you will get a banded effect. Keep going, and it will become consistent again. At that point, it's right.
Here is a shot of it starting to print the frog...

This one failed: One of the front feet came loose.
I'm running it again now, having cleaned the build surface more thoroughly.